Mô tả

>> Your Search for an in-depth microcontroller programming course ends here !!<<<

Course code: MCU1

Learn bare-metal driver development using Embedded C : Writing drivers for STM32 GPIO,I2C, SPI,USART from scratch

English Subtitles/CCs are enabled for this course.

Update 6: videos are updated with the latest STM32CUBEIDE

Update 5: All drivers are developed in a live session with step-by-step coding and added stm32-Arduino communication exercises using SPI and I2C.

Update 4: Dedicated support team is assigned to address student's Q/A

Update 3: English Closed captions are fixed

Update 2  : Added Bus matrix / memory map /vector table /interrupt design discussion with code examples.

Update 1: Eclipse IDE setup for ARM Cortex M based MCUs added


The course is designed for beginners to advanced audiences.


Brief Description:

This course Demystifies the internal working of the Microcontroller and its Peripherals.

Coding for the Peripherals STEP-BY-STEP and Developing software drivers entirely from scratch by extracting maximum information from Datasheets, Reference manuals, specs, etc

Protocol Decoding Using logic analyzers, Debugging, Testing along with Hints and Tips.


Long Description:

Learning Embedded System Programming can be a challenge. Since it's a relatively complex field, there's no actual gold standard yet for how things are practiced, or taught, which can frustrate people who are just trying to learn new things and couldn't connect the dots.

This is the motivation behind creating this course to help engineers and students learn different aspects of embedded systems by providing high-quality advanced lectures at a relatively low price.


Master Behind the Scene working;

created this course because I believe your time is precious, and you shouldn't have to hunt around to get a practical foundation In Embedded System Programming. In this course, you will learn to write your peripheral driver for most commonly used peripherals such as GPIOs, I2C, SPI, USART, etc., and the exciting thing is that you will learn everything from scratch.

No 3rd party libraries!

No blind coding!

Write your driver APIs by dealing with the peripheral registers of the MCU!

Code and Implement APIs from scratch, diving into the datasheet and reference manual of the MCU. I will thoroughly explain how to extract the maximum information from datasheets, Technical Reference manuals to configure and handle peripherals. These techniques you can go and apply to any MCUs you have at your hand.

In this course, I will walk you through step-by-step procedures on configuring various Peripherals like GPIOs, SPI, USART, I2C by taking you into the reference manual and datasheet. We will develop a fully working driver code, interrupt handlers, sample application everything from scratch to understand the big picture.

In each lecture, I assure you that you will learn something new to use in your work or projects. You'll find yourself handling these peripherals with much more clarity. You will be able to speculate and debug the problem quickly. I'll show you tricks and tips to debug the most common issues using debugging tools such as logic analyzers.


This is not the Arduino style of programming:

I believe Arduino is for quick prototyping of projects/products but not for mastering the working of micro-controllers and their peripherals. Unlike Arduino programming, where you develop a quick solution and prototyping of products using third-party libraries, this course is entirely different. In this course, no 3rd party libraries are used. Everything we will code by referring to the technical reference manual of the MCU and will create our own library. The Power of this approach is that you can quickly speculate problems and debug like a pro when things go wrong in your project due to bugs. If one thing me and my students are good at is "debugging,." To achieve good debugging skills, it's essential to code by understanding how things work behind the scene but not by blindly using some third-party libraries, and that's the biggest TAKE away from this course.

The course is designed and explained so that it is generic across any microcontroller. The code we develop can be used as templates to quickly build a peripheral driver for your MCUs on-chip peripherals.


Software/Hardware used:

In this course, the code is developed so that it can be ported to any MCU you have at your hand. If you need any help porting these codes to different MCUs, you can always reach out to me! The course is strictly not bound to any 1 type of MCU. So, if you already have any Development board that runs with an ARM-Cortex M3/M4 processor, I recommend you continue using it. But if you don't have any development boards, then check out the below Development boards.


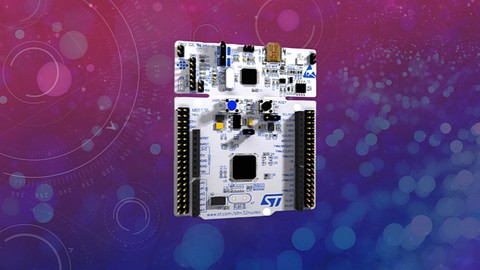
1. STM32F407xx based Discovery board ( This is the board used in this course)

MCU Vendor: STMicroelectronics


IDE: STM32CUBEIDE (Free)


My promise:

I am confident that this course will save you many hours of studying/experimenting/googling time to learn about MCU programming. I will personally answer your questions about this material, either privately or in a group discussion. If you are not satisfied, for any reason, you can get a full refund from Udemy within 30 days. No questions asked. But I am confident you won't need to. I stand behind this course 100% and am committed to helping you.


Learning order of FastBit Embedded Brain Academy Courses,

If you are a beginner in the field of embedded systems, then you can take our courses in the below-mentioned order.

This is just a recommendation from the instructor for beginners.

1) Microcontroller Embedded C Programming: absolute beginners(Embedded C)

2) Embedded Systems Programming on ARM Cortex-M3/M4 Processor(ARM Cortex M4 Processor specific)

3) Mastering Microcontroller with Embedded Driver Development(MCU1)

4) Mastering Microcontroller: TIMERS, PWM, CAN, RTC,LOW POWER(MCU2)

5) Mastering Microcontroller: STM32-LTDC, LCD-TFT, LVGL(MCU3)

6) Embedded System Design using UML State Machines(State machine)

7) Mastering RTOS: Hands-on FreeRTOS and STM32Fx with Debugging(RTOS)

8) ARM Cortex M Microcontroller DMA Programming Demystified(DMA)

9) STM32Fx Microcontroller Custom Bootloader Development(Bootloader)

10) Embedded Linux Step by Step using Beaglebone Black(Linux)

11) Linux device driver programming using Beaglebone Black(LDD1)

Bạn sẽ học được gì

Understand Right ways of Handling and programming MCU Peripherals

Develop Peripheral drivers for your Microcontroller

Understand complete Driver Development steps right from scratch for GPIO,SPI,I2C and USART.

Learn Writing peripheral driver headers, prototyping APIs and implementation

Explore MCU data sheets, Reference manuals, start-up Codes to get things done

Learn Right ways of handling/configuring Interrupts for various peripherals

Learn about Peripheral IRQs/Vector table/NVIC interfaces and many

Learn about Configuration/status/Control registers of various Peripherals

Demystifying behind the scene working details of SPI,I2C,GPIOs,USART etc.

Explore hidden secretes of MCU bus interfaces, clock sources, MCU clock configurations, etc.

Understand right ways of enabling/configuring peripheral clocks/serial clocks/baud rates of various serial protocols

Learn about MCUs AHB, APB bus protocols

Learn about different MCU clocks like HCLK, PCLK, PLL,etc

Learn to capture/decode/analyze traces of serial protocols on Logic analyzer

Learn about Quick ways of debugging peripheral issues with case studies

Yêu cầu

  • Basic knowledge of C programming
  • If you are completely new to MCU and C programming language then you are advised to finish our "Embedded C" course for absolute beginners first

Nội dung khoá học

76 sections

Notes and Information

5 lectures
About the instructor
00:17
Important Note
00:43
What is this course all about ??
05:57
Source Code and Slides
00:02
Rating and Review
00:32

Development board used in our courses

1 lectures
About MCU Development board
03:27

Hardware/Software Requirements

1 lectures
Hardware/Software Requirements
00:05

IDE installation

5 lectures
Downloading STM32CUBEIDE
01:39
Installation-Windows
00:43
Installation-Ubuntu
02:01
Embedded Target
02:48
Documents required
02:44

Creating a project using STM32CUBEIDE

4 lectures
Creating Hello-World project
09:53
SWV working principle
09:07
Testing Hello-World through SWV
05:32
OpenOCD and Semihosting to use printf
05:59

Embedded Code Debugging Tips and tricks

10 lectures
Debugging options
04:55
Single stepping
10:18
Disassembly and Register windows
03:48
Breakpoints
06:17
Expression and variable windows
04:32
Memory browser windows
07:56
Call stack and fault analyzers
07:25
Data watch-points
04:32
SFR windows
04:42
Other basic features of IDE
04:59

Understanding MCU Memory Map

4 lectures
Understanding Memory Map of the MCU: Part 1
05:10
Understanding Memory Map of the MCU: Part 2
03:04
Understanding Memory Map of the MCU: Part 3
08:31
Test your understanding
1 question

MCU Bus Interfaces

5 lectures
MCU Bus Interfaces Explanation Part 1: I-Code/D-Code/S-Bus
13:21
MCU Bus Interfaces Explanation Part 2: AHB/APB1/APB2
08:13
MCU Bus Interfaces Explanation Part 3: Q/A session
11:26
Understanding MCU Bus Matrix
06:19
Test your understanding
1 question

Understanding MCU Clocks and Details

1 lectures
Understanding MCU Clocking System:Part1
05:57

Understanding MCU Clock tree

7 lectures
Understanding MCU clock sources and HSE
11:04
HSI and RCC registers
11:24
Peripheral clock configuration
12:39
Exercise : HSI measurements
08:34
About USB logic analyzer
05:33
Code implementation
12:22
Exercise : HSE measurements
08:39

Understanding MCU Vector table

1 lectures
Understanding MCU Vector Table
24:11

Understanding MCU interrupt Design , NVIC, Interrupt handling

3 lectures
Understanding MCU interrupt Design , NVIC, Interrupt handling: Part 1
10:03
Understanding MCU interrupt Design , NVIC, Interrupt handling: Part 2
06:33
Understanding MCU interrupt Design , NVIC, Interrupt handling: Part 3
13:31

Importance of "Volatile" Keyword

2 lectures
Importance of "Volatile" Keyword: Part-1
09:53
Importance of "Volatile" Keyword-Part 2
07:42

GPIO Must know concepts

8 lectures
GPIO pin and GPIO port
02:21
GPIO behind the scene
03:00
GPIO input mode with high impedance state
01:13
GPIO input mode with pull-up/down state
01:15
GPIO output mode with open drain state
05:53
GPIO output mode with push pull state
02:47
Optimizing I/O power consumption
03:11
Test your understanding
1 question

GPIO Programming structure and Registers

9 lectures
GPIO programming structure
02:44
Exploring GPIO PORT and pins of STM32F4xx Discovery board
00:57
GPIO Mode register(used to set mode for a pin)
05:39
Input configuration of a Microcontroller's GPIO Pin
11:42
Output Configuration of a GPIO Pin in Push pull mode
02:39
Output Configuration of a GPIO Pin in open drain mode
04:57
Input stage of a GPIO pin during output configuration
00:34
Alternate functionality Configuration of a GPIO pin
02:45
GPIO out put type register explanation
01:06

GPIO Registers : SPEED, PULL UP/DOWN, IDR and ODR

4 lectures
GPIO output speed register and its applicability
05:39
GPIO Pull up and Pull down register
00:58
GPIO input data register
01:05
GPIO output data register and summary of various modes discussed
02:30

GPIO Alternate functionality register and example of usage

6 lectures
Alternate functionality settings of a GPIO pin with example : Part 1
04:44
Alternate functionality settings of a GPIO pin with example : Part 1
05:37
Request for Review
00:21
Find Out I/O Alt Functionality
1 question
Test your understanding
1 question
Test your understanding
1 question

GPIO peripheral clock control

1 lectures
Enabling and disabling GPIO peripheral clock
01:25

GPIO driver development overview and Project creation

5 lectures
GPIO driver development overview
03:49
MCU Specific header file and its contents
02:26
New project creation and creating MCU specific headerfile
04:26
Include path settings
02:17
Important note on IDE usage
00:19

Updating MCU specific header file with bus domain and peripheral details

6 lectures
Writing base address C macros for MCU's embedded memories : Part 1
03:38
Writing base address C macros for MCU's embedded memories : Part 2
02:13
Defining base addresses of different bus domains
06:00
Defining base addresses of AHB1 Peripherals
03:02
Defining base addresses of APB1 and APB2 Peripherals
01:52
Defining base addresses conclusion
04:48

Structuring peripheral registers

3 lectures
Address of peripheral registers
01:50
Structuring peripheral registers
13:04
Peripheral definition macros
04:04

Writing Clock enable and disable macros

2 lectures
Writing peripheral clock enable and disable C Macros
07:53
Project include settings and build
02:59

GPIO driver API requirements and handle structure

5 lectures
Creating GPIO driver header and source file
01:47
Defining GPIO handle and configuration structure
05:15
Driver API requirements and adding API prototypes
06:47
Driver API input parameters and return types
09:00
Driver empty API implementation and documentation
03:03

GPIO driver API Implementation : Clock control

1 lectures
Implementation of GPIO peripheral clock control API
02:20

GPIO driver API Implementation : GPIO init and de-init

5 lectures
Writing user configurable macros
07:40
Implementation of GPIO init API
06:30
Implementation of GPIO init API contd.
02:22
Configuring Alternate function registers
08:53
GPIO de-init API implementation
04:49

GPIO driver API Implementation : GPIO data read and write

3 lectures
Implementation of GPIO input port read and input pin read APIs
04:04
Implementation of GPIO output port write and output pin write APIs
02:20
Implementation of GPIO pin toggle API
01:11

Exercise

6 lectures
Exercise : LED toggling with PUSH PULL configuration
11:15
Exercise : LED toggling with OPEN DRAIN configuration
06:13
Exercise : Handling on board LED and Button
11:13
Exercise : Connecting external button and circuit explanation
09:45
Exercise : Testing button interface
02:45
Exercise : Button interrupt introduction
01:13

GPIO pin Interrupt configuration

7 lectures
GPIO pin Interrupt configuration coding : Part 1
06:54
GPIO pin Interrupt configuration coding : Part 2
05:11
GPIO pin Interrupt configuration coding : Part 3
01:06
GPIO pin Interrupt configuration coding : Part 4
15:01
GPIO pin Interrupt configuration coding : Part 5
09:41
GPIO pin Interrupt configuration coding : Part 6
10:19
GPIO pin Interrupt configuration coding : Part 7
12:12

Exercise : GPIO interrupts

3 lectures
Exercise : External button interrupt implementation
21:30
Exercise : Debugging the application : Part 1
08:59
Exercise : Debugging the application : Part 2
03:55

MCU I/O Pin specifications

3 lectures
STM32 Pin specifications
14:40
Pin current characteristics
12:21
Logic levels
16:55

SPI introduction and bus details

5 lectures
Introduction to SPI Bus
06:20
SPI comparison with other protocols
04:08
Importance of SPI slave select pin
02:23
SPI Minimum bus configuration
02:23
SPI behind the scene data communication principle
04:02

SPI bus configuration and functional block diagram

2 lectures
SPI bus configuration discussion : full duplex, half duplex and simplex
05:41
SPI functional block diagram explanation
06:49

STM32 NSS pin settings and management

2 lectures
NSS settings in STM32 master and slave modes
02:58
STM32 SPI hardware and software slave managements
06:27

SPI CPOL and CPHA discussion

2 lectures
SPI CPOL and CPHA discussion
11:54
SPI CPOL and CPHA waveform example
07:42

SPI serial clock discussion

2 lectures
SPI peripherals of your Microcontroller
01:27
SPI Serial clock frequency
05:06

SPI Driver : API requirements and configuration structure

3 lectures
SPI API requirements and configuration items
07:06
updating MCU specific header file with SPI related details
01:42
SPI adding API prototypes to driver header file
05:17

SPI Driver API Implementation : Clock control

1 lectures
Implementation of SPI peripheral clock control API
04:19

SPI Driver API Implementation : SPI init

3 lectures
SPI user configuration options writing and register bit definition macros
18:17
Implementation of SPI init API : Part 1
03:16
Implementation of SPI init API : Part 2
04:22

SPI Driver API Implementation : Send Data

4 lectures
Implementation of SPI send data API : Part 1
07:32
Implementation of SPI send data API : Part 2
04:48
Implementation of SPI send data API : Part 3
05:41
Implementation of SPI send data API : Part 4
01:01

Exercise : SPI Send Data

6 lectures
Exercise to test SPI Send Data API
02:03
Finding out microcontroller pins to communicate over SPI2
04:14
Exercise : Code implementation : Part 1
04:15
Exercise : Code implementation : Part 2
07:22
Exercise : Code implementation : Part 3
05:30
Exercise : Testing
14:55

Exercise : STM32 master and Arduino Slave communication

5 lectures
Exercise : Communicating with Arduino slave
12:24
Exercise : Coding Part 1
06:56
Exercise : Coding Part 2
03:08
Exercise : Coding Part 3
03:45
Exercise : Testing
07:06

SPI Driver API : Receive data

2 lectures
Implementation of SPI data receive API : Part 1
02:05
Implementation of SPI data receive API : Part 2
01:50

Exercise : SPI receive data

4 lectures
Exercise : SPI command and response based communication
08:18
Exercise : Coding Part 1
10:07
Exercise : Coding Part 2
09:05
Exercise : Coding Part 3
13:37

SPI interrupts

1 lectures
SPI peripheral interrupting the processor
06:46

SPI interrupt mode APIs

3 lectures
SPI interrupt mode API implementation and changes to handle structure
05:04
SPI send data with interrupt API implementation
04:35
SPI receive data with interrupt implementation
01:35

SPI Driver API : IRQ handling

5 lectures
SPI : Handling of interrupts
04:10
SPI IRQ handler implementation : Part 1
07:38
SPI IRQ handler implementation : Part 2
09:16
SPI IRQ handler implementation : Part 3
09:40
Exercise
15:50

Common problems in SPI

1 lectures
Common problems in SPI and Debugging Tips
06:14

I2C introduction and I2C signals

2 lectures
I2C introduction and differences with SPI
11:57
I2C SDA and SCL signals
03:27

I2C modes

1 lectures
I2C standard and fast mode
03:57

Understanding I2C Protocol

5 lectures
I2C Protocol explanation
05:45
I2C START and STOP conditions
09:16
I2C ACK and NACK
03:01
I2C Data validity
03:47
Quiz SPI and I2C
3 questions

I2C master and slave communication

2 lectures
Example of master writing to slave
03:38
Understanding repeated START condition
05:21

STM32 I2C functional block diagram

1 lectures
I2C functional block diagram
04:04

I2C driver API requirements and config structures

5 lectures
I2C driver API requirements
06:34
I2C handle and configuration structure
00:29
I2C user configurable macros
04:56
I2C API prototypes
02:59
Steps for I2C init implementation
03:57

I2C serial clock discussion(SCLK)

2 lectures
I2C serial clock settings with explanation
09:45
Clock Stretching
03:30

I2C Driver API : I2C Init

3 lectures
Implementation of I2C init API : Part 1
10:23
Implementation of I2C init API : Part 2
04:44
Implementation of I2C init API : Part 3
07:47

I2C Driver API : I2C Master send data

6 lectures
I2C transfer sequence diagram for master sending data
10:27
Implementation of I2C master sending data API : Part 1
06:17
Implementation of I2C master sending data API : Part 2
02:15
Implementation of I2C master sending data API : Part 3
04:26
Implementation of I2C master sending data API : Part 4
03:03
Implementation of I2C master sending data API : Part 5
01:59

I2C pull up resistance , rise time and bus capacitance

2 lectures
I2C pull up resistance , rise time and bus capacitance discussion
17:49
I2C rise time calculation
03:54

Exercise

4 lectures
Exercise : Introduction
10:19
Exercise : Coding Part 1
09:35
Exercise : Coding Part 2
04:03
Exercise : Testing
05:25

I2C Driver API : I2C Master receive data

4 lectures
I2C transfer sequence diagram for master receiving data
12:15
Assignment : I2C master receive data API implementation
01:44
Implementation of I2C master receive data API : Part 1
07:50
Implementation of I2C master receive data API : Part 2
03:24

Exercise

5 lectures
Exercise : Reading data from the I2C slave
06:25
Exercise : Coding Part 1
05:01
Exercise : Coding Part 2
13:45
Exercise : Coding Part 3
03:39
Exercise : Testing repeated start
08:03

I2C Interrupts and IRQ numbers

4 lectures
I2C IRQ and interrupt discussion
05:41
I2C errors and importance of BUSY flag
08:49
I2C handle structure modification
02:29
I2C adding interrupt related macros and interrupt APIs
03:17

I2C interrupt based APIs

2 lectures
Assignment : I2C interrupt APIs implementation
02:10
Implementation of I2C interrupt based APIs
02:06

I2C IRQ handler implementation

9 lectures
I2C IRQ handler implementation Part 1
08:41
I2C IRQ handler implementation Part 2
04:42
I2C IRQ handler implementation Part 3
08:10
I2C IRQ handler implementation Part 4
03:07
I2C IRQ handler implementation Part 5
03:54
I2C IRQ handler implementation Part 6
12:04
I2C IRQ handler implementation Part 7
03:35
I2C IRQ handler implementation Part 8
04:18
I2C error IRQ handler implementation
03:26

Exercise

2 lectures
Exercise : Testing I2C interrupt APIs part 1
19:05
Exercise : Testing I2C interrupt APIs part 2
02:02

I2C slave programming

3 lectures
I2C slave programming discussion
06:01
I2C transfer sequence diagram for slave transmitter
08:07
I2C slave support in driver
05:20

Exercise

4 lectures
Exercise : I2C slave programming
02:59
Exercise : Coding Part 1
14:40
Exercise : Testing
02:19
Exercise : Modifying I2C transactions
04:02

Common problems in I2C

1 lectures
Common Problems in I2C and Debugging Tips
03:50

UART Essentials

6 lectures
Intro UART vs USART
03:14
Understanding UART pins
02:34
UART frame formats
01:45
Baud Rate
02:18
Synchronization bits
01:28
UART Parity
03:53

UART functional block and Peripheral Clock

2 lectures
Exploring UART functional block
02:26
UART peripheral clock
01:53

UART Communication

3 lectures
UART Transmitter
03:17
Uart Receiver
04:29
UART Start bit Detection
1 question

USART driver development

6 lectures
USART driver development confiugrable items
05:06
USART driver APIs prototypes
02:15
Configuration options and USART registers
10:05
USART Driver API : USART Init
01:54
USART Driver API : Tx and Rx assignment
01:29
USART Driver API : Send data
05:26

USART oversampling and baudrate

4 lectures
USART oversampling
07:10
USART Baud rate calculation Part-2
07:59
USART Baud rate calculation Part-2
04:10
USART baudrate coding
06:04

Exercise

2 lectures
Exercise : USART send data to arduino
16:48
communicating with PC over UART
03:45

USART interrupts

3 lectures
USART interrupt discussion
03:03
Exercise
03:20
USART IRQ handler implementation : Assignment
00:06

Exercise : RTC on LCD

15 lectures
Real time clock on LCD
18:38
DS1307 RTC registers
19:58
RTC code implementation
21:40
RTC coding for set time and date
07:08
RTC coding for get time and date
06:59
BCD and Binary manipulation functions
09:25
Writing RTC application
18:15
RTC and Systick
12:34
LCD connections
04:59
Significance of LCD pins
06:10
LCD initialization
08:22
LCD initialization flowchart
10:13
Sending command and data to LCD
13:07
Creating LCD command code
13:57
Testing
17:57

BONUS LECTURE

1 lectures
BONUS LECTURE
01:41

Đánh giá của học viên

Chưa có đánh giá
Course Rating
5
0%
4
0%
3
0%
2
0%
1
0%

Bình luận khách hàng

Viết Bình Luận

Bạn đánh giá khoá học này thế nào?

image

Đăng ký get khoá học Udemy - Unica - Gitiho giá chỉ 50k!

Get khoá học giá rẻ ngay trước khi bị fix.