Mô tả

Instructor Info

Abraham Leal is the Director and Founder of Critical Hit Studio & Academy. With the studio and academy, he is proud to be able to spread his artistic knowledge to everyone in his hometown and is extremely excited to be working on big entertainment projects in Mexico.  What inspired Abraham to be a 3D artist is The Hobbit book and all the lore that surrounds it. Being able to tell stories and share his own voice is what motivates him to create and imagine new and exciting characters. Prior to becoming a 3D artist, he was going to medical school and he decided to do a complete 180 and get into Digital Design and Entertainment Production. When he quit medical school, he couldn't draw, paint, or sculpt to save his life but he was so convinced of his definite desire and worked hard to turn it into a reality. His advice to artists who want to get into the 3D industry is to practice properly, be patient and stay humble. He believes in always having a goal in mind, and always open to learning and improving.

Course Info 

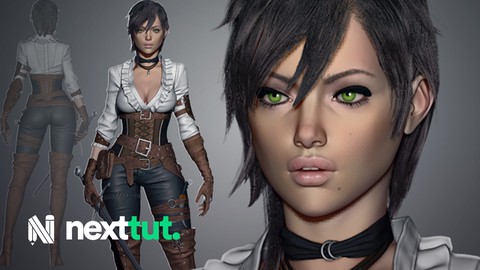
Would you like to know how to sculpt a high resolution full body character and take it to a complete low poly game ready mesh? Would you like to improve your skills as a 3D character artist to boost your portfolio? Then this course is for you.

My name is Abraham Leal. I’m a professional 3D artist with several years of relevant experience and I am the owner of Critical Hit Studio. In this course, I will show you how to create a game character from start to finish.

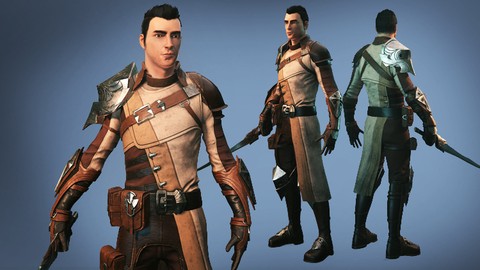
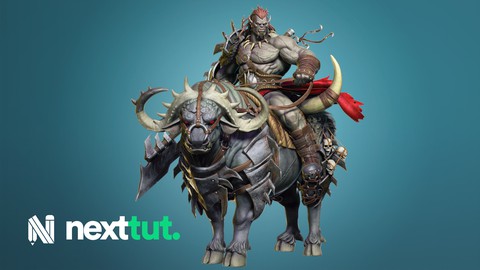
We will begin by sculpting our character in Zbrush. I will show you the important things you need to watch out for when sculpting a male character, and how to get a perfect proportion so the character will look great with clothing. We will create our cloth in Marvelous Designer and then add extra details in Zbrush to really bring out the quality. We will model our armor, sword and our accessories using Maya, we will cover techniques on how to create clean hard surface edges and a nice organic feel for some specific props. We will create details like scratches and damages to the armor, belt, straps, and the rest of our accessories to truly bring them to life. After creating our high resolution meshes, we will retopologize everything so we can have a clean topology that is animation-ready. Then we will unwrap our models, bake our maps and create our textures. We will then apply all of these textures to our character to further enhance it. Our final result will be an amazing full body male character fitted with clothing and props that is suitable for animation and game engine.

From sculpting your character, to retopologizing and creating proper UVs, to texturing and presentation, by the end of this course, you will have a professional game-ready character. Commit to being the best artist you can be. Be actively engaged in the pursuit of success. When you put in the work with patience and effort, achievement will follow. Come and join me in this course at Victory3D.

Bạn sẽ học được gì

How to sculpt an amazing male character

How to get a perfect proportion so the character looks great in clothing

Create realistic cloth and apply details

Model armor, sword, belt and other accessories

Learn important techniques for hard surface modeling

Create aging details such as scratches, damages, and dirt

Retopologizing for clean topology and animation-ready

Unwrap, bake and create textures

Post work and presentation

Yêu cầu

  • Basic knowledge of Zbrush, Maya, Substance Painter, & Photoshop required

Nội dung khoá học

5 sections

Introduction

2 lectures
Introduction
01:43
Project Breakdown
11:31

Sculpting & Modeling

47 lectures
Body Types BaseMesh
21:03
Proportions and Body Adjustments
12:00
Blocking of the Face
14:27
Features of the Face Part 1
16:53
Features of the Face Part 2
18:39
Blocking of the Hair
12:39
Sculpting the Ear and Model Preparation
17:37
Intro to Marvelous Designer
14:00
Creating the Shirt
16:44
Creating the Pants & Exporting Cloth
10:14
Checkpoint and Adjustments
21:01
Customization & Materials
05:44
Sculpting Folds
15:16
Sculpting Shirt Details
14:00
Modeling the Collar
27:54
Sculpting the Collar
11:23
Modeling the Cape Part 1
19:23
Modeling the Cape Part 2
15:13
Modeling the Cape Part 3
18:25
Modeling the Belt
17:24
Modeling the Belt Buckle
23:16
Modeling the Side Bag
20:45
Modeling the Side Bag Insignia
18:38
Modeling the Secondary Bag
18:56
Modeling the Tertiary Bag
13:34
Modeling the Chest Belt
16:12
Modeling the Insignia
15:11
Modeling the Shoulder Pad
19:54
Modeling the Pants & Protection
13:00
Modeling the Pants Straps
05:29
Modeling the Shoulder Armor
16:59
Modeling the Glove Part 1
17:56
Modeling the Glove Part 2
11:00
Modeling the Glove Part 3
15:15
Modeling the Boot Part 1
16:19
Modeling the Boot Part 2
17:18
Modeling the Boot Part 3
10:15
Organizing Props in Zbrush
06:00
Sculpting Metal Props Part 1
15:20
Sculpting Metal Props Part 2
16:17
Sculpting Metal Props Part 3
15:22
Sculpting the Braces
16:23
Sculpting the Cape
14:39
Sculpting the Pants
15:21
Sculpting the Leg Protections
12:20
Sculpting the KneePads and Bags
09:54
Sculpting the Lower Cape
10:28

Retopology

33 lectures
Preparing the Model for Retopology
14:10
Retopology of the Face Part 1
12:24
Retopology of the Face Part 2
16:10
Retopology of the Face Part 3
17:17
Adding High Frequency Detail
19:58
Retopology of the Neck Part 1
18:13
Retopology of the Neck Part 2
17:05
Retopology of the Shoulder Part 1
16:25
Retopology of the Shoulder Part 2
15:54
Retopology of the Chest Part 1
21:10
Retopology of the Chest Part 2
17:39
Retopology of the Chest Part 3
15:50
Retopology of the Abdomen
20:02
Deformation Test
12:22
Retopology of the Hands Part 1
10:26
Retopology of the Hands Part 2
21:49
Retopology of the Hands Part 3
11:42
Retopology of the Forearm Part 1
18:07
Retopology of the Forearm Part 2
18:20
Retopology of the Legs Part 1
18:30
Retopology of the Legs Part 2
17:02
Retopology of the Boots Part 1
13:12
Retopology of the Boots Part 2
02:38
Retopology of the Feet Part 1
16:13
Retopology of the Feet Part 2
08:46
Finishing the Pants
17:04
Retopology of the Belt
14:18
Combining the Body
14:32
Retopology of the Metal Props Part 1
15:10
Retopology of the Metal Props Part 2
10:06
Retopology of the Leather Shoulder Pad
14:03
Retopology of Bags Part 1
23:02
Retopology of Bags Part 2
17:05

Unwrapping, Baking & Texturing

31 lectures
Preparing the Character for UVs
04:30
UVs Process Overview
04:19
Uving the Body
16:16
Uving the Head
03:33
Adding the Inner Mouth
09:24
Uving the Props
11:38
Organizing Our UVs
22:10
Preparing the File for Baking
04:21
Baking the Textures
14:06
Reviewing the Bakes
02:22
Texturing the Upper Body Part 1
15:55
Adding the Missing Belt
11:02
Texturing the Upper Body Part 2
16:28
Texturing the Upper Body Part 3
12:46
Damaging the Leather
17:20
Aging the Metal
18:53
Aging the Cloth
12:16
Texturing the Props Part 1
20:35
Texturing the Props Part 2
13:02
Texturing the Face Part 1
18:59
Texturing the Face Part 2
17:31
Texturing the Face Part 3
13:22
Exporting Textures
22:28
Setting Up Shaders
17:46
Creating the Eyes Part 1
17:06
Creating the Eyes Part 2
11:43
Setting Up the Eyes
13:52
Creating a Lighting Setup
11:02
Adding Detail to the Skin
19:37
Fixing the Normal Maps
20:59
Tweaking Eyes & Mouth
16:30

Hair, Sword & Presentation

14 lectures
Understanding the Hair
05:57
Xgen Part 1
19:51
Xgen Part 2
07:55
Xgen Part 3
08:12
Hair Bakes Setup
23:01
Hair Shader Setup
07:00
HairCard Workflow
12:21
Hair Process 1
16:01
Cinematic Lights
18:55
Marmoset Post Processing
11:48
Sword Part 1
16:45
Sword Part 2
18:50
Sword Part 3
16:37
Final Render Setup
15:17

Đánh giá của học viên

Chưa có đánh giá
Course Rating
5
0%
4
0%
3
0%
2
0%
1
0%

Bình luận khách hàng

Viết Bình Luận

Bạn đánh giá khoá học này thế nào?

image

Đăng ký get khoá học Udemy - Unica - Gitiho giá chỉ 50k!

Get khoá học giá rẻ ngay trước khi bị fix.