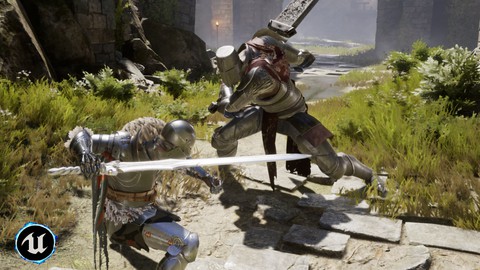
Learning Unreal Engine: From Beginner To Advanced
Loại khoá học: 3D & Animation
Get Up To Speed With A Working Knowledge Of Unreal Engine 4 and 5 Fast, And Have Fun At The Same Time
Mô tả
Everything you'll learn in this course can be applied to Unreal Engine 5.
You can even switch the layout of Unreal Engine 5 back to classic Unreal Engine 4 if you'd like to make it easier to follow along.
Keep in mind that Unreal Engine 5 requires a powerful computer to run efficiently, so be sure that your computer is powerful enough to run the program. Unreal Engine 4 runs much faster on less powerful computers, so many people are staying with this version until they can upgrade their machines.
Unreal Engine has become a leading resource in the creation of games, animations, television shows and feature films! In this course we will take the absolute beginner from knowing nothing about Unreal Engine 4 and 5 to a workable understanding of:
Scene setup
Importing assets & characters
Lighting setup
Basic material setup and application
The Sequencer (Unreal Engine's animation & editing timeline)
Setting up a simple animation
Importing audio into the Sequencer
Rendering your movie out to a movie file for further manipulation
STUNNING CINEMATICS
You will learn how to create a stunning cinematic animation scene in Unreal Engine from beginning to end
FREE COPY OF UNREAL ENGINE
You will learn how to get your own free copy of Unreal Engine
REAL TIME RENDERING
Learn the benefits of "real-time rendering & animation," a true game changer in the industry
EPIC MANNEQUIN CHARACTER
You will learn how to get the awesome Epic Mannequin character along with ready-made animations for your project
SUPER REALISTIC PBR MATERIALS
You will learn how to use realistic PBR (Physically based materials) in your scene to give ultra realism
EDIT WITH HITFILM 3 EXPRESS
You will learn how to color grade your scene with HitFilm 3 Express (we'll show you where to get this free program) and upload your finished scene to YouTube
TESTIMONIAL
"One word for this course . . . "fantastic." This course is as close to perfection as you can get. The instructor speaks slowly, with enthusiasm. He covers all the necessities without bogging you down with too much info. I love how he gets you having fun quickly with the Sequencer section. The audio is of great quality. His depth of knowledge in a variety of 3d packages is amazing. I am familiar with Daz 3d, Mixamo and Unreal but I learned so many great tips and discovered several things that I was doing incorrectly. I searched YouTube for Unreal Engine 4 sequencer tutorials and found none of them to be satisfactory. After ten minutes with this course, I was very confident with Sequencer. If you are interested in getting Daz 3d characters into Unreal, and a ton of tips and information on top of it, you do not want to miss out on this fantastic course." ~ J Jackson
What You Will Learn In This Course
In this course we will cover the steps on how to animate your character in Unreal Engine. This is a project based course, and I’ve designed it to be really, really fun. All the scene files you will need are included in the course. You will get the Exile Alien character along with 28 motion-capture animations that work with him. You’re going to love how easy it is - you just drag and drop your character in the scene and it’s ready to go.
We’re also going to cover lighting, physically based materials, camera movement and much more. Best of all it’s fun.
DAZ Studio Export
We will cover how to prepare your Daz Genesis character for export and animation. There are certain steps that need to be taken in order for the character to be able to accept motion-capture animations in Mixamo and then imported into Unreal Engine.
Mixamo
(Note: Even though Mixamo discontinued direct support for Unreal Engine, this method works by exporting standard Fbx from Mixamo to Unreal Engine 4.)
Next, we’ll upload your character into Adobe Mixamo and add motion-capture animations. Mixamo is a ton of fun, and super easy to use as you’ll see. There are literally thousands of animations in Mixamo, and all you have to do is click on the animated preview and it will be applied to your character. So you’re basically auditioning your character using different animations. You can adjust the speed of the animation, and adjust things like the arm spacing as well. Your character won’t have his materials or textures applied - we will do that over in Unreal Engine.
Unreal Engine 4 - Drag and Drop Animation
Inside of Unreal Engine we will have some fun with the Mixamo animations you applied to your character. All you have to do is select your character and drag him into your scene. Hit play, and the animation begins, being rendered in real-time.
An Army of Animated Aliens
Inside the course, there are 28 animated aliens, ready for you to drag and drop into your Unreal Engine scene for instant animations! In no time at all, you’ll have your aliens fighting, jumping, running, or falling. You’ll have enough animations to make some really awesome movie scenes.
Unreal Engine Sequencer
Next up is the Unreal Engine Sequencer, which is very similar to a non-linear editor. We will set up your scene, complete with spaceship interior, Exile alien characters, lights, smoke effects and cameras and get it ready for animation. Sequencer makes it really fun to get your scene set up and feels very similar to being on a real movie set. In fact, I’ve found that’s the best way to think about it - like you’re in the real world. Unreal Engine’s lighting system behaves like real world lights, so it’s very responsive and intuitive, as you will see.
Exporting your video file - and rendering in near real time
Now we will export your movie in high-definition... in near real time. No longer does it take hours or days to render a single frame. This is a real game changer. Imagine being able to setup, animate and then render 1 minute of finished animation per day...it would be entirely possible to complete a 2 hour feature film in 120 days. Unreal Engine has provided the tools to make this possible some day.
HITFILM Express
We will then take our rendered video file and bring it into HitFilm Express, or your favorite video editing program. There we will add color grading, music, sound effects and fine tune our edits to prepare our scene for final output.
Your finished High-Definition Scene
By the end of the course you will have completed your own animation scene from beginning to end and have a good understanding of Unreal Engine's animation workflow.
Go ahead and click on the enroll now button to get immediate access to your scene files and get started right away!
To recap, you’ll get:
The Exile Alien Character along with 28 motion-capture animations
The complete Unreal Engine 4 project with all assets
The Genesis 2 Male and Female characters
Complete sci-fi spaceship interior
Best of all, it’s fun
See you on the inside
LEARN FACIAL ANIMATION & MORE WITH UNREAL ENGINE 4 & DAZ STUDIO
Both of these outstanding animation programs are free and will allow you to create stunning and highly professional character animations. In this course we will go over the simple techniques that unlock the little known animation powers inside of Unreal Engine. By using the high quality Daz 3d characters, you will learn how to export any morph targets you'd like from Daz Studio and then utilize them inside of Unreal Engine. (Note: Even though there is a Daz to Unreal Bridge there are some issues with it and its good to learn how to do this manually as discussed in this course)
REAL TIME ANIMATION RENDERING
By far one of the most powerful features of Unreal Engine is the ability to see your animations playing in real time as you work. No more slow, sluggish systems that cramp your style and hinder your animation creativity. Unreal Engine is a breeze to use, and best of all ... it's fun. When you're ready to export your animation to an image sequence for later compositing or to a video file, you will be able to render your animation out in near real time.
IN THIS COURSE YOU WILL LEARN:
How to prepare your Daz 3d character for export to Unreal Engine 4 with all the morph targets and expressions you wish
How to use the Puppeteer tool in Daz Studio as a way to export morphs and animations
How to properly import your Daz 3d character with it's skeleton, rigging, morph targets, materials and textures
Learn where the morph sliders are in Unreal Engine and how to use them
Create a realistic blink animation for your character
Create side to side and up & down eye movements for your character
Animate mouth movements for speech as well as expressions
Animate your characters head movements
Create and animate believable expressions
Learn about amazing new tools that work in conjunction with Unreal Engine 4 such as Allright Rig & Akeytsu
Plus much, much more
Included In The Course Are Five (5) Fully Rigged Characters
Super Dude - this character is an original creation by Michael Ricks sculpted in ZBrush. Inspired by the characters from the hit film 'The Incredibles,' Super Dude comes fully rigged with a ton of facial morphs. You'll have an absolute blast right away when you start sliding around the controls and see what hilarious expressions you can make with him. He also comes with the phoneme mouth shapes for accurate lip sync punctuation. Super Dude is based on the Daz 3d Genesis 8 character.
Wendy - this cute Toon girl character is also an original creation by Michael Ricks and was sculpted in ZBrush, based on the Daz 3d Genesis 3 character. She also comes with many facial morph and expression controls and will immediately come alive for you in Unreal Engine 4. With her big expressive eyes, you will have her emoting in no time at all.
Lil' Frankenstein - this Toon character was also created by Michael Ricks in ZBrush and is based on the Daz 3d Genesis 3 character. Frankie comes with a wide array facial morphs and can create many emotions. You'll have tons of fun with Lil' Frankenstein all year around, not just on Halloween.
Billy - also created and sculpted in ZBrush by Michael Ricks, this Toon boy character is based on the Daz 3d Genesis character and comes with a wide variety of facial morphs. You'll have a blast animating Billy.
Epic Robot - this way cool robot character is created by Epic Games for the hit VR game Robot Recall. He's a stunning 3d character asset and really fun to animate. He comes with an included animation and sound wave 'roar' so you'll have him up and running right away.
NOW IS THE BEST TIME TO LEARN ANIMATION! SO GO AHEAD AND CLICK THE ENROLL NOW BUTTON AND LET'S BEGIN
All these characters are included in the course and are for your use both personal and professional for cinematics and film/video use. If you desire to use the characters in an actual game as a playable character you will need to purchase an interactive license from Daz 3d as these characters are based on the Genesis models. At this time, game licenses are running approximately $30-$50 per character for a published game.
"The course is well organized and it's a good beginner course. I would recommend this for anybody wanting to learn the basics of unreal engine 4 cloth simulation." ~Robert S
"There is essential info concerning clothes in Unreal Engine 4. I had issues about a character and asked help to Michael. His dedication to help you solve your issues is amazing. 5 stars, and I go to follow his other courses. Thanks again Michael for your professionalism." ~Luter L
__________________________________________________________________________
LEARN HOW TO CREATE AMAZING, REAL TIME CLOTH ANIMATION
In this course you will learn the simple, easy steps to apply real-time cloth animation to your characters. Once a very difficult task, the folks at Epic Games have made this process a lot easier and actually FUN to do, right inside of Unreal Engine 4.
FULLY RIGGED CHARACTERS ARE INCLUDED IN THIS COURSE
You will have access to the amazing Paragon Sevarog and Paragon Narbash characters that are fully rigged and come complete with motion-capture animations.
ONLY A FEW SIMPLE STEPS ARE NECESSARY
You will be taken thru the easy step-by-step process of painting cloth weights to create your animation. You will learn how to use the wind tool inside of Unreal Engine 4 to get your character's clothing to blow in the wind! (This is a little known feature)
Best of all, the process is simple, and anyone can do it once they follow the steps.
YOU WILL LEARN ABOUT PHYSICS ASSETS AND HOW TO CREATE AMAZING ANIMATIONS WITH IT
In this course you will learn about physics assets and how to set it up on your character to create amazing animations that look like it took you days to hand animate. This is one of the hidden features of Unreal Engine 4 that few have figured out how to use. It's amazingly powerful - you're going to love it.
ANIMATION ASSETS
You will learn how to create reusable animation assets that can be imported into Sequencer, blended with other animations and then exported out into a cinematic movie file.
ENROLL NOW
Now is the perfect time to enroll in the course and have fun learning cloth animation in Unreal Engine 4! See you on the inside
IMPORTANT: Everything you'll learn in this course can be applied to the new releases of Character Creator 4 and iClone 8.
In this course you will learn one of the most powerful animation workflows available today -
Reallusion's Character Creator 3, iClone 7 and Unreal Engine
Learn how to create an original 3D Character in Character Creator 3
Learn how to send your character to iClone 7 ready for animation
Learn how to pose and animate your character in iClone 7
Learn how to perform facial animation and lip sync with your character
Discover how to use powerful tools such as Motion Puppet, Direct Puppet and Face Puppet
You will learn how to record your animations for later use on other characters
You will learn how to render and export your video from iClone 7
You will learn how to use "Live-Link" to send your character to Unreal Engine for animation and scene setup
You will learn how to setup your scene in Unreal Engine and record the animation there
You will also learn how to setup and use the amazing Live Face App for iPhone X, 11, or 12 to create high quality lip sync and facial animations.
You're going to love how intuitive and simple it is to create your very own custom character in Character Creator 3. In no time at all you will be creating broadcast and film quality characters that are rigged and ready to animate in iClone 7. You will learn how to apply mocap animations to your character and adjust the animation to your liking - all within iClone 7.
After that you will discover the powerful workflow of sending your character and animation to Unreal Engine, using Live-Link, and then record your animation inside of Unreal Engine in real-time.
And the best part? It's fun. Now is the perfect time to jump in and learn this powerful workflow that will assist you in bringing your creative vision to life.
RIGGING YOUR CHARACTER IN UNREAL ENGINE
New: Allright Rig's price has now been lowered to $49.99 in the Unreal Engine Marketplace.
Even with the introduction of the new Epic Control Rig, I have found the Allright Rig to be a very helpful tool. It's an all in one tool, where you can rig your character's body and facial morphs, so it is ready for animation in Sequencer.
Finally. The Holy Grail of animation (Lip Synch animation) can be done inside of Unreal Engine 4 with the new plugin "Allright Rig 2.0" created by Alexander Shatalov.
Complete Unreal Engine 4 Scene File
Allright Rig 1.3 (free version)
"Dweller" creature character, fully rigged (created by Josh P. Crockett)
Presets for Genesis, Genesis 2, Genesis 3, & Genesis 8 characters
Complete video instruction (over 3.5 hours) on how to rig and animate your character - from beginning to end
No longer do you need to purchase expensive programs such as Maya and 3ds Max to animate your characters - now you can achieve stunning quality with the powerful combination of Daz Studio, Unreal Engine and Allright Rig 2.0
Here is some additional information about the plugin:
Modular rigging system allows you to create any kind of rigs.
Facial rigging using bones and blend shapes.
Baking animation from an animation sequence to the rig and vise versa.
Partial animation editing.
Pose library.
Copy/paste, mirror animation using animation tools.
Animation constraints such as parent, point, orient, scale and aim.
Animation curve filters such as butterworth, peak removal, simplify curve.
Custom Blueprint library.
Presets for different character rigs.
Open source.
ENROLL NOW
Now is the perfect time to enroll in the course and have fun learning Unreal Engine. See you on the inside.
Bạn sẽ học được gì
You will learn how to download & install your personal free copy of Unreal Engine
You will learn how to create your first Unreal Engine scene
You will learn how to import assets to the Unreal Engine
You will learn how to apply materials to your imported asset
You will learn how to light a scene - in just a few simple steps
You will learn how to create an animation sequence and add your assets to the sequence
You will learn how to create a simple animation - ready to render in high-definition video
You will learn how to export your scene out to a video file, ready for further manipulation
You will learn how to create a stunning cinematic animation scene in Unreal Engine, from beginning to end
You will learn how to create the scene in the "Preview This Course" video, step-by-step
You will receive all scene files including alien character, male & female characters, spaceship interior & music
Learn the benefits of "real-time rendering and animation" - a true game changer in the industry
You will learn how to export a Genesis character from Daz Studio, and import it to Mixamo to prepare for animation
Learn how to export the character and animations from Mixamo and then import them to Unreal Engine 4
You will learn how to use realistic Pbr (Physically based rendering) Materials in your scene to give ultra realism
You will learn how to create smooth camera moves inside Unreal Engine 4, giving your scene a professional cinematic look and feel
You will learn how to color grade your scene with HitFilm Express ( a free video editing program) and upload your finished scene to YouTube
You will get a tutorial on how to use Unreal Engine 4's "Decals" which will give your scene a new level of realism
The Complete Unreal Engine Scene File Ready To Go Out-of-the-Box
A Really Cool Toon House To Use In Your Scenes Created by Michael Ricks ($25.00 value)
Four (4) Rigged Daz Original Toon Characters Included With the Course Created by Michael Ricks ($60.00 retail value)
Rigged Robot character included in course (compliments of Epic Games)
You will learn how to create high quality facial animations & more
Learn how to export morph targets (expressions) out of Daz Studio and bring them into Unreal Engine 4
Create high quality blink animations, the basis for realistic characters
Animate side-to-side and up & down eye movements for believable characters
Animate Mouth movements and mouth expressions.
Animate head movements with the little known animation tools within Unreal Engine 4
Create believable, expressive expressions, right within Unreal Engine 4
Includes the incredibly detailed Paragon Sevarog and Paragon Narbash fully rigged characters
You will learn how to use the incredibly fun and powerful cloth tools in Unreal Engine in a few easy steps
You will learn the easy, simple steps to create real-time cloth animation inside of Unreal Engine 4
You will learn how to use physics assets in Unreal Engine 4 that will interact with cloth and clothing
No additional software programs are needed to achieve cloth simulation & animation other than Unreal Engine
You will learn how to create an "Animation Asset" from your cloth and physics character setup
Use your characters in games, film, television and commercials
Easy and fun - once you know the simple steps
You will learn how to jump into iClone 7 and get a fast start to animating your characters
Learn how to create an original 3d Character in Character Creator 3
Learn how to send your character to iClone 7 ready for animation
Learn how to pose and animate your character in iClone 7
Learn how to perform facial animation and lip sync with your character
Discover how to use powerful tools such as Motion Puppet, Direct Puppet and Face Puppet
You willYou will learn how to render and export your video from iClone 7 learn how to record your animations for later use on other characters
You will learn how to use "Live-Link" to send your character to Unreal Engine for animation and scene setup
You will learn how to setup your scene in Unreal Engine and record the animation there
You will be able to rig and animate a character in Unreal Engine 4 using the Allright Rig plugin and output your animations to video
You will receive the Creature "The Dweller" by Josh P. Crockett - fully rigged and ready to animate
Course includes the full Unreal Engine 4.17 scene - setup and ready to go! (v 4.17 required for the free version of Allright Rig 1.3)
UE4 Scene Contains Allright Rig 1.3 (free version) installed
Full step-by-step instructions on how to setup your characters with Allright Rig 2.0
Instructions on how to prepare your characters for rigging in Allright Rig 2.0
Allright Rig 2.0 Presets for Daz characters: Genesis, Genesis 2, Genesis 3, Genesis 8
Allright Rig 2.0 Presets for Paragon characters: Shinbi and Dekker
Yêu cầu
- A copy of Unreal Engine, which is free. No knowledge of Unreal Engine is required. You will learn the easy, simple steps to get up and running in Unreal Engine quickly and have lots of fun in the process
- DAZ Studio 4.1, which is free
Nội dung khoá học
Viết Bình Luận
Khoá học liên quan


Đăng ký get khoá học Udemy - Unica - Gitiho giá chỉ 50k!
Get khoá học giá rẻ ngay trước khi bị fix.
Đánh giá của học viên
Bình luận khách hàng