Mô tả

Welcome to the Blazor WebAssembly E-Commerce Course!


In this online course, we’re going to build an e-commerce web application with .NET 6 & Blazor WebAssembly.

We’ll cover the complete stack, meaning Blazor for the client, a Web API for the back end web service, and Entity Framework Core with SQL Server Express for the database.


The course starts with a walking skeleton. This means, right at the beginning of this course, and in just a few hours you learn how to build a running full-stack web application with all the mentioned frameworks and technologies.

So, after this section, you won’t use any mock data, for instance. You will already make calls to the web service, grab data from the SQL Server and return the results back to the Blazor WebAssembly client.


On top of that, we will introduce best practices to that walking skeleton. For instance, we don’t want to use fat controllers. Instead, we’ll use the repository pattern together with dependency injection.

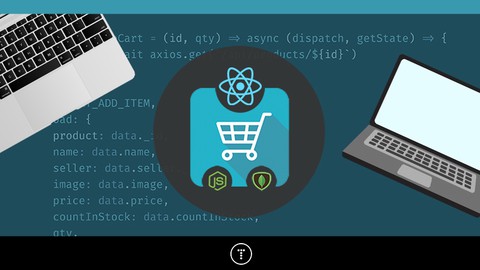
After that, we build a huge part of the e-commerce application. This section is all about the products your users can buy in your shop, it’s about categories, product variants, a search bar, pagination, a basic cart, and so on.

With all these implementations you learn lots of features of Blazor WebAssembly, together with the Web API and also relationships between entities and how to manage them with Entity Framework Core and SQL Server.


After that, we dive into authentication with JSON web tokens.

You will learn how to register users, log them in and create JSON web tokens (JWT) to authenticate your users, set the token in the default HTTP request header, utilize the famous [Authorize] attribute to secure your Web API, and add a page for the users' profile so that they can change their password, for instance.


The next section is all about the cart and orders. Until this point, you’ve already implemented a cart, but it only works offline. So now it’s time to store the products of the cart in the database and also implement the final order and an overview of the order history.


But one thing will still be missing, and that’s an option to checkout and pay for your order. We cover that with the next section and use Stripe to do that. This means, your users can pay with a credit card, Google Pay and Apple Pay. Additionally, we’ll continue with a smaller section where we implement the option to add a delivery address.


And after that, it’s time for the big administration dashboard. Everything you’ve learned so far comes together in this section.

We utilize lots of features of Blazor WebAssembly, we build several CRUD operations for our entities - meaning an administrator should be able to create, read, update and delete all products, categories, and product variants - and to know if the user is allowed to do all that, we introduce role-based authorization.

As you can see, there’s a lot to learn!


Here's an overview of what you will learn in this course:

Introduction

- Install the .NET 6 Framework & Visual Studio 2022

- Get the source code from GitHub

Full Stack Foundations - Building a Walking Skeleton

- Create a Blazor WebAssembly ASP.NET Core Hosted Project

- Debug your project

- Learn about the new Hot Reload feature of .NET 6 & Visual Studio 2022

- Create Razor Components & utilize CSS Isolation

- Implement a Web API Controller & test it with SwaggerUI

- Install & use SQL Server Express and Entity Framework Core 6

- Utilize Code-First Migrations with EF Core 6 & Seed Data programmatically

- Create a Git repository and push your code to GitHub

Adding & Using Best Practices

- Implement a Service Response with Generics

- Use the Repository Pattern and Dependency Injection

- Create Services for the client and the service

It's all about Products - Blazor WebAssembly in Action

- Add more models & entities to your web application like categories, variants, and more

- Use several features of EF Core 6 like composite primary keys, more migrations & relationships

- Utilize several built-in components of Blazor WebAssembly

- Realize a search feature & pagination

- Implement a custom layout

- Add a cart using the local storage to your application

Let's add Users - Authentication with JSON Web Tokens

- Implement user registration & login

- Use data annotations & validation

- Introduce the user model

- Add token authentication with JSON Web Tokens (JWT)

- Implement a custom AuthenticationStateProvider

- Add a return URL to the login

- Utilize the [Authorize] attribute

Let's buy some Products - Cart & Orders

- Store the cart of a user in the database

- Use the HttpContextAccessor to access the user in the services

- Store the orders in the database

- View an order history

- Utilize the authentication state of the user

Ka-Ching! - Payment with Stripe Checkout

- Introduce Stripe

- Use Stripe Checkout for payments

- Fulfill an Order with WebHooks

- Enable a shipping address in Stripe Checkout

Where are you from? - Add a Delivery Address

- Add an address model with a new migration

- Create a shared component for the cart and the user profile page

We need more stuff! - Admin Dashboard

- Introduce role-based authorization on the client & the server

- Extend your models

- Create several administration pages

- Implement CRUD operations (create, read, update, delete) for your entities


If you don’t know me yet from YouTube or my other courses on Udemy, my name is Patrick God, I’m going to be your instructor for this course. I’m a web developer for over a decade now, I have worked for big corporations and small teams, as an employee and a contractor and I just love to see the way Microsoft is going with .NET & Blazor and how important these technologies get day by day.

So far, I’ve created 10 courses on Udemy about .NET (Core), Blazor WebAssembly, single-page applications, Angular, and DevOps - with a total of more than 60.000 students and countless 5-Star reviews.


If you’re still not sure if this course is right for you, there's a 30-day money-back guarantee. So, feel free to check it out and get your money back if it’s just not for you. No questions asked.


Apart from that, you can always ask questions in the Q&A sections that the community (including me) is happy to answer and you also get the complete source code, if there happens to be a problem with that.


Are you ready?


I’m looking forward to seeing you in the course!

Bạn sẽ học được gì

Build a full stack Blazor WebAssembly application by the example of an E-Commerce Website

Create a Walking Skeleton with .NET, Blazor WebAssembly, a Web API, Entity Framework Core & SQL Server right at the beginning

Implement Best Practices with Generics, Data-Transfer-Objects (DTOs) and the Repository Pattern

Build several features of an E-Commerce App, like Search, Pagination, Featured Products, a Cart (local & database), Orders and many more

Implement Authentication with JSON Web Tokens (JWT)

Use Role-Based Authorization for Administrators & Customers

Use Code-First Migration with Entity Framework Core & SQL Server

Implement Payment with Stripe Checkout providing Credit Card, Apple Pay & Google Pay

Create a Custom Layout for your Blazor WebAssembly Application

Implement Administration Features with all CRUD operations to Create, Read, Update & Delete your Products

Yêu cầu

  • Experience with C#, HTML & CSS is preferable
  • Experience with Blazor WebAssembly is not a must, but helps
  • All frameworks and tools used in this course are available for free and we'll install everything together along the way

Nội dung khoá học

10 sections

Introduction

3 lectures
Course Overview
03:21
Install .NET & Visual Studio
02:33
GitHub Repository
00:19

Full Stack Foundations - Building a Walking Skeleton

25 lectures
Introduction
00:57
Create the Blazor WebAssembly Project
03:45
Solution Overview
05:39
Debug the Project
06:00
Trust the Dev Certificate
01:55
Hot Reload with .NET 6 & Visual Studio 2022
06:24
Add the Product Model
07:50
Your First Component
13:25
Images don't show up? Here's why.
00:19
CSS Isolation
06:24
Fixing Bootstrap from .NET 5 / Bootstrap 5 CSS Fix
01:51
Your First Web API Controller
11:22
Call the Web API from the Client
07:21
Add SwaggerUI
04:45
Install SQL Server
01:43
Add the ConnectionString
02:03
Install Entity Framework
01:42
Install Packages for Entity Framework Core, Code-First Migration & SQL Server
02:15
Add the DataContext
04:44
Register the DbContext & Configure SqlServer
02:10
Your First Migration with Entity Framework Core
06:45
Seed Data
03:29
Get Products from the Database
04:50
Create the GitHub Repository
01:46
Summary
02:35

Adding & Using Best Practices

6 lectures
Introduction
01:55
Implement a Service Response with Generics
04:12
Using Services with Dependency Injection
08:24
Add the ProductService to the Client
06:30
Use the ProductService in the ProductList Component
03:06
Summary
03:40

It's all about Products - Blazor WebAssembly in Action

50 lectures
Introduction
02:19
Show Product Details with Page Parameters
10:48
Get a Single Product from the Server
05:25
Get a Single Product on the Client
04:59
Little CSS Fix
02:23
Introducing Categories
03:10
Add Category Seeding & Migration
04:51
Seed More Products
05:22
Get all Categories with a new Service & Controller
08:04
Add a CategoryService on the Client
04:56
Display Categories in the NavMenu
04:41
Get Products by Category from the Server
05:21
Get Products by Category on the Client
12:18
Introducing Product Variants
07:55
Add a Composite Primary Key & More Seeding
03:42
Add Product Variants Migration
02:28
Include Product Variants & Types in the Product Service
05:00
Display the Price in the ProductList Component
04:09
Display the Price in the ProductDetails Component
07:08
Use a Select Box for the Product Variant
03:57
Introducing a Product Search Feature
01:11
Search a Product on the Server
05:32
Get Product Search Suggestions
09:19
Add Search Methods to the Client
05:53
Implement a Search via URL in the Index.razor Component
02:19
Implement the Search Component
13:40
Use a Custom Layout
09:16
Add a Home Button
03:57
Introducing Featured Products
03:14
Load Featured Products
03:08
Show Featured Products with a new Component
11:36
Introducing Pagination & Data-Transfer-Objects (DTOs)
04:25
Implement Product Search Pagination on the Server
06:36
Add Pagination to the ProductService on the Client
03:23
Add Pagination to the Components
05:44
Introducing the Cart with the Local Storage
02:30
Create a Cart Counter
01:48
Add a CartItem Class
00:55
Implement a CartService on the Client
05:22
Implement “Add to Cart” Button in ProductDetails Component
03:39
Show the Number of Items in the Cart Counter
04:05
Turn Cart Items into Products on the Server
15:20
Get the Cart Products on the Client
02:50
Implement the Cart Page
10:58
Remove an Item from the Cart
07:54
Add the Quantity to Cart Models
00:39
Modify the Cart Services
02:36
Add Option to Update the Quantity
01:50
Update the Quantity with an Input Number Field
08:29
Summary
04:12

Let's add Users - Authentication with JSON Web Tokens

35 lectures
Introduction
00:43
Add the UserRegister Model
01:27
Create the User Registration Page (EditForm without Validation)
06:15
Implement a User Menu Button
07:22
Add Data Annotations for Validations
01:59
Add Validation to the Registration Form
02:10
Use a Validation Message instead of the Validation Summary
01:40
Add a User Model for the Database
04:13
Add an Authentication Service on the Server
02:31
Check if a User already exists
01:31
Implement the User Registration on the Server
06:11
Add the AuthController
04:49
Create the AuthService on the Client
01:16
Implement the Registration on the Client
01:41
Use the AuthService on the Registration Page
03:08
Display a Success Message after Registration
03:46
Add a UserLogin Model
01:11
Add the Login Page
03:51
Prepare the Login on the Server
05:09
Verify the User’s Password
05:49
Create the JSON Web Token
07:31
Implement the Login on the Client
08:33
Implement a Custom AuthenticationStateProvider
17:39
Expose the Authentication State
02:45
Build a Logout Option with the AuthorizeView Component
06:50
Add a Return Url to the Login
06:23
Create a User Profile Page
02:43
Utilize the [Authorize] Attribute on the Client
03:50
Add a UserChangePassword Model
02:09
Change the Password on the Server
03:40
Add Authentication Middleware
05:17
Implement Changing the Password in the AuthController
03:28
Implement Changing the Password on the Client
02:04
Change the User’s Password on the Profile Page
04:51
Summary
05:18

Let's buy some Products - Cart & Orders

26 lectures
Introduction
01:23
Change the CartItem & Add it to the Database
03:00
Prepare the Cart for Authenticated Users
02:38
Store Cart Items in the Database
10:15
Use the HttpContextAccessor to Access the User in the Services
04:36
Get the Number of Cart Items from the Server
02:47
Implement a Method to Check if the Current User is Authenticated
01:17
Get the Number of Cart Items on the Client
05:31
Handle the Number of Cart Items on Login and Logout
01:39
Get the Stored Cart Items from the Server
04:03
Refactor the CartService on the Client
05:33
Add a CartItem to the Database
06:12
Update the CartItem Quantity in the Database
06:41
Remove a CartItem in the Database
06:29
Prepare the Order Implementations (Models, Migration & a Composite Key)
08:25
Implement Placing an Order on the Server
08:56
Implement Placing an Order on the Client
09:49
Empty the Cart after Placing an Order
02:53
Say “Thank You” after Placing an Order
03:40
Move GetUserId() to the AuthService
03:45
Get Orders from the Server
09:02
Implement Receiving Order on the Client
09:59
Get Order Details from the Server
11:13
Show Order Details on the Client
11:23
Move IsUserAuthenticated() to the AuthService on the Client
02:39
Summary
01:26

Ka-Ching! - Payment with Stripe Checkout

9 lectures
Introduction & Get a Stripe Account
03:57
Stripe Dashboard
01:40
Install Stripe.net in the Server Project with NuGet
00:51
Redirect the User to a Stripe Checkout Page
05:37
Create a Checkout Session on the Server
17:34
Create a Success Page & Place an Order
04:54
Fulfill an Order with WebHooks & Store the Order in our Database
19:29
Enable a Shipping Address in Stripe Checkout
03:33
Summary
02:45

Where are you from? - Add a Delivery Address

5 lectures
Add Address Model & New Migration
04:07
Implement the Address Logic on the Server
08:51
Implement the Address Logic on the Client
04:04
Create a Shared AddressForm component
10:56
Use the Address Form in the Cart & Profile Components
06:54

We need more stuff! - Admin Dashboard

28 lectures
Introduction
00:43
Add a Role to the User Model and to the Token in the AuthService
03:13
Create the Admin Menu Component & a Categories Admin Page
09:43
Add More Properties to the Category Model
03:59
Implement all CRUD Operations for Categories on the Server
10:50
Implement all Client-Side CRUD Operations for the Categories
08:51
Implement the Administration Page for Categories
19:44
Re-render the Menu after changing the Categories
02:07
Load the Product Types from the Server for Administration
06:24
Add ProductTypeService Implementations to the Client
03:33
Create the ProductType Administration Page
11:27
Add & Update Product Types on the Server
04:00
Add & Update Product Types on the Client
03:25
Finish the ProductType Administration Page
08:29
Change the Product & ProductVariant Model for Administrations
03:28
Use the new flags in the ProductService Methods
05:37
Load the Products for Administration
03:04
Get the Products for Administration on the Client
02:45
Create the Administration Page for Products
11:21
Add an Edit & Create Button for Products
03:29
Get a Single Product for Administrators
05:04
Create, Update & Delete Products on the Server
11:50
Create, Update & Delete Products on the Client
03:26
Implement the EditProduct Component
27:43
Test (and fix) the Create & Update Implementations
06:19
Implement Deleting a Product on the EditProduct Page
04:16
Summary
02:40
Closing Words
03:12

Bonus: Upload Images & MudBlazor Introduction

11 lectures
Introduction
02:20
Preparations
03:32
Add the Image Model
02:18
Add a New Migration
02:30
Create a New Product with Multiple Images
10:43
Include Multiple Images
02:54
Update Product Images & Remove Images
10:17
Install MudBlazor
04:49
Display Images with MudBlazor
09:56
Show an Image Carousel on the Product Details Page
05:39
Use the First Image of an Image List in Products, ProductList & FeaturedProducts
06:20

Đánh giá của học viên

Chưa có đánh giá
Course Rating
5
0%
4
0%
3
0%
2
0%
1
0%

Bình luận khách hàng

Viết Bình Luận

Bạn đánh giá khoá học này thế nào?

image

Đăng ký get khoá học Udemy - Unica - Gitiho giá chỉ 50k!

Get khoá học giá rẻ ngay trước khi bị fix.